
It occurred to me recently that there are probably people out there interested in buying a pre-made chipboard album but feel intimidated by the process of adding photos to them. I recently worked on one with my 9 year-old daughter and, with a collection of 4x6 photos we picked ahead of time, we were able to easily size and glue them into place. I have posted pics of the nearly finished album below. It's missing the journaling, but my daughter will add that on her own.
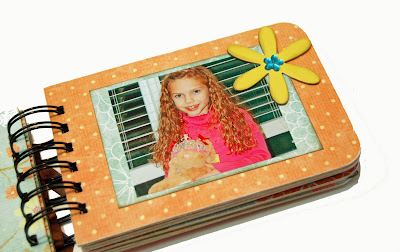
One of the things you'll notice is that the layering of papers and mats make how you place or size a photo very flexble. The photo above is of my daughter showing off her freshly painted nails and I didn't want to crop it too small and lose the detail, so I left it larger and tilted it at an angle across the mats. I love the way it looks -- much better than if I'd trimmed it to fit perfectly on the mat. You'll notice that one thing I do when I make the album itself is to make sure that any part of an embellishment (sticker, chipboard flower, etc) that hangs over a photo mat is not glued to the mat portion. This allows the user to slip photos under the embellishments for added dimension. Or, if you would prefer, you can just crop your photo to fit into the space next to it. It's up to you and what you think looks best. Remember there is no right or wrong and each photo does not have to fit squarely on the pre-placed mat. I really use the mats as a background for the photos to create contrast, which is why you'll frequently see a light and dark mat together.
Another thing worth mentioning is that almost every photo is improved by cropping. It just brings more focus to the subject of the photo without a lot of background to take away from it. We found our photos were much improved by the process of cropping and adding them to the album.
So, the only tools we used for this project were scrapbook adhesive tape and a paper trimmer. Click on the links for examples of these items. You can pick these up at a craft store like Michael's and they're useful to have around for other projects as well. The trimmer has a ruler, which is useful as well, but I found that more often than not I just eyeballed size and placement by trimming a little at a time until I had the size that looked best. Please check out the photos of the completed scrapbook below, and feel free to post a comment with any questions you may have. 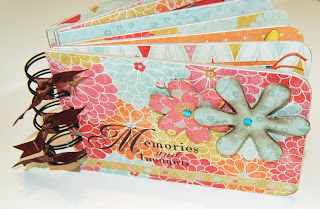 And, really, give it a try sometimes. You'll love the end result!
 And, really, give it a try sometimes. You'll love the end result!


No comments:
Post a Comment